BLOG
BLOG
Stage Two: Rear Fuselage
09/11/2025
My microlight is actually starting to look like a plane.
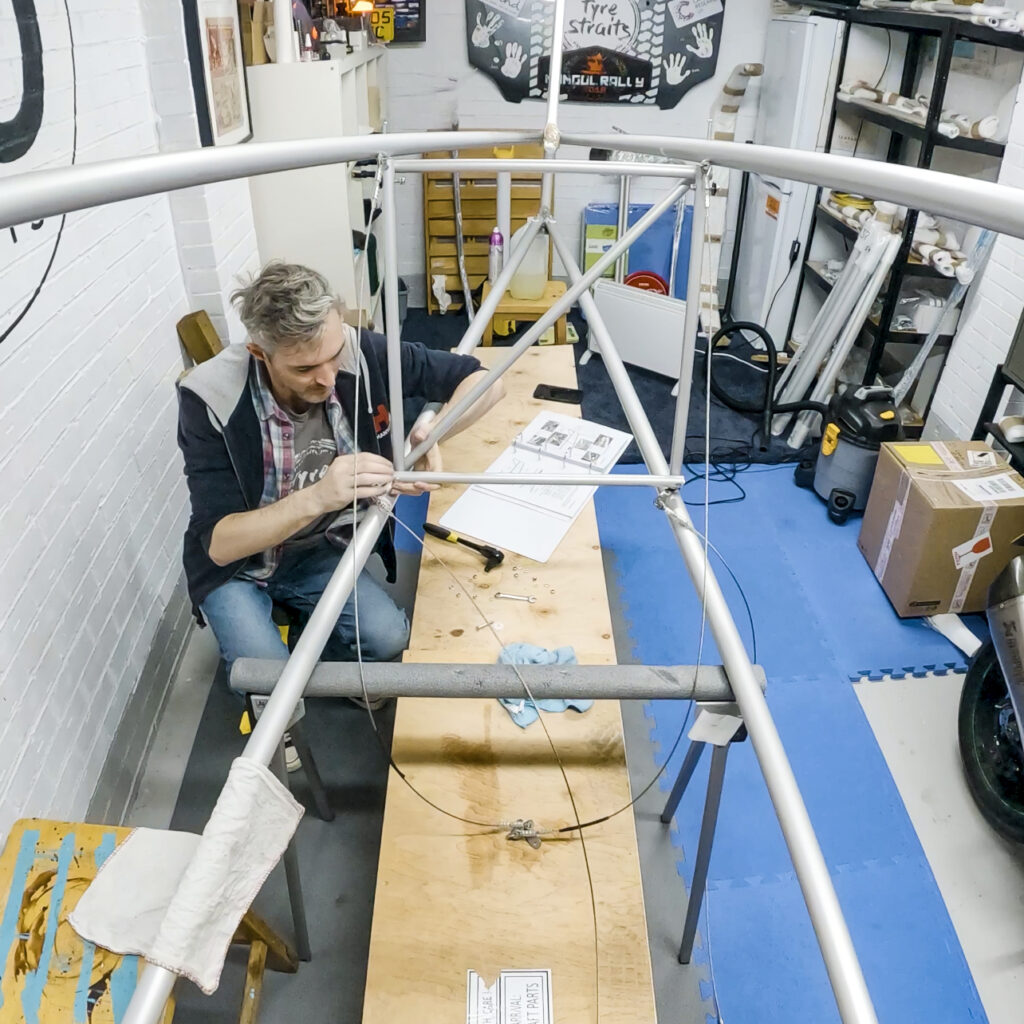
Having finished the structure of the forward section, my attention has moved onto the rear section. The rear section comprises four longitudinal beams which are bolted to the front section at one end, and come together at the base of the vertical stabiliser at the rear. They are supported mid-point by a square section (actually… it’s probably better if you just check out the photo).
Constructing this rear section didn’t take too long, but once it was in place, it has to be braced by steel cables. Again, this isn’t a hugely challenging task, but it took me some time to get it right; you have to identify the correct cables, and apply appropriate pre-tension to ensure that, when attached, they are sufficiently taught. The final tensioning occurs when the nuts and bolts of the rear section are tightened (although two of the cables have turnbuckles to allow fine-tuning).
I’ve now completed this, and it’s looking rather good. The only outstanding task is to heat-shrink sections of tubing that protect the cables where they cross each other, and apply some zip-ties to reduce movement/friction/annoying rattling!
Whilst I’ve been working on this, I’ve also completed some smaller tasks which will feature a little further along in the build. I’ve drilled holes on the trailing edge of the starboard elevator, in preparation for riveting on the elevator trim tab. And speaking of which, I’ve drilled and attached the horn to the tab itself, in preparation for its control cables.
My next task is to test mount the horizontal stabilisers, elevators and their control cables, and assemble the rudder and its horn, and test-mount that too.
I also have a confession. I’ve made my first mistake – and, unfortunately, it’s a costly one. I shall be bringing you more details soon (once I’ve finished processing the shame!).
For more on my build, don’t forget to check out my Status page.
To watch me install the bracing cables, check out my YouTube video.
And don’t forget to follow me on Instagram (my main social media channel) for the latest updates.
Thanks once again to everyone who’s liking and commenting on my photos, videos, and blog posts. The main reason I’m doing this is to meet and engage with like-minded people. So, thank you!